
In summary:
- Forget basic tips; preventing swimwear mishaps on extreme slides requires understanding physics like G-forces and hydrodynamic drag.
- Your choice of swimwear material is critical. Low-friction fabrics like polyester blends are your best defense against the slide.
- Properly secured gear, from chest-mounted cameras to water shoes, is non-negotiable for both safety and performance.
- Partner weight and positioning on multi-person slides dramatically affect speed and forces, making teamwork essential.
- Mental and physical prep, like controlled breathing, is as important as your gear for conquering the most intimidating attractions.
There’s a universal moment of terror that every thrill-seeker knows. It’s not the dizzying height of the slide or the stomach-lurching vertical drop. It’s the split-second splashdown at the end, followed by a frantic, panicked check to ensure your swimwear is still where you left it. The fear of an unplanned public debut can often eclipse the thrill of the ride itself. You’ve probably heard the standard advice: wear a one-piece, tie your strings in a double-knot, or maybe throw on a pair of shorts over your bikini.
While these tips aren’t wrong, they’re the amateur league. For the truly extreme slides—the ones with near-vertical drops and high-G turns—they’re like bringing a pool noodle to a tsunami. As a water sports expert, I’m here to tell you that securing your suit isn’t about hope and tight knots. It’s about engineering. The real key is to understand the forces at play: the hydrodynamic drag trying to rip the fabric off, the G-force peaks at the bottom of a drop that test every seam, and the shear stress from thousands of gallons of water blasting you at 40 mph.
But what if the secret wasn’t just in the swimwear, but in a holistic approach to your entire water park strategy? This guide will deconstruct the physics of the water slide and give you an expert-level toolkit. We will cover everything from the dynamics of riding with a partner and the science of the right footwear to the surprising reason why your choice of shorts matters for harness rides. It’s time to shift your focus from the potential spill to the pure, unadulterated thrill.
For those who prefer a visual rush, the following video showcases some of the most intense water slides from around the world. It’s the perfect primer to understand the kind of forces we’re about to tame, complementing the practical strategies in this guide.
To master these aquatic beasts, we need a plan. This article breaks down the essential strategies into a clear, actionable roadmap, guiding you from team dynamics on tandem slides to the fine art of selecting friction-resistant materials. Prepare to become an engineer of your own water park experience.
Summary: Your Engineering Guide to Extreme Water Slides
- Why You Need a Partner for the Slingshot Slide?
- Why Water Shoes Are Mandatory for the Shark Lagoon Walk?
- Shark Safari vs Snorkeling: Which One Gets You Closer to the Sharks?
- Chest Mount vs Head Strap: What Is Allowed on the Slides?
- The Tower of Poseidon Stairs: How Many Steps Before You Drop?
- Feeding Time vs Dive Time: When Is It Safest to Dive with Sharks?
- Why Short Shorts Are a Bad Idea for Harness Comfort?
- Deep Water vs Shallow Water Interaction: Which Is Better for Non-Swimmers?
Why You Need a Partner for the Slingshot Slide?
On a “slingshot” or multi-person raft slide, your partner isn’t just there for moral support—they are a critical component of the ride’s physics. It’s a common misconception that two lighter riders are “safer.” In reality, the total mass in the tube directly dictates the experience. More weight means more momentum, leading to higher speeds and more intense G-forces in the turns, sometimes reaching up to 3Gs. A fascinating physics study on multi-rider slide dynamics confirms this, showing that heavier riders often travel faster than the water flow itself. Their velocity is a balance between their weight and the inertial drag of the water.
This is why partner selection and positioning are strategic. Pairing with a heavier partner can turn a fun ride into an extreme one. The standard expert protocol is to place the heavier rider at the back of the tube. This positioning maximizes acceleration down the steepest drops and helps maintain stability. An unbalanced or rotating tube is often the result of improper weight distribution or a poorly synchronized start. Think of it less like hopping in a raft and more like balancing a high-performance vehicle before a race. Your combined weight is the engine, and your positioning is the steering.
Ultimately, a good partner acts as a ballast and an accelerator. By consciously working together, you transform from passive passengers into an active team that can push the ride to its thrilling limits, all while staying securely in the raft.
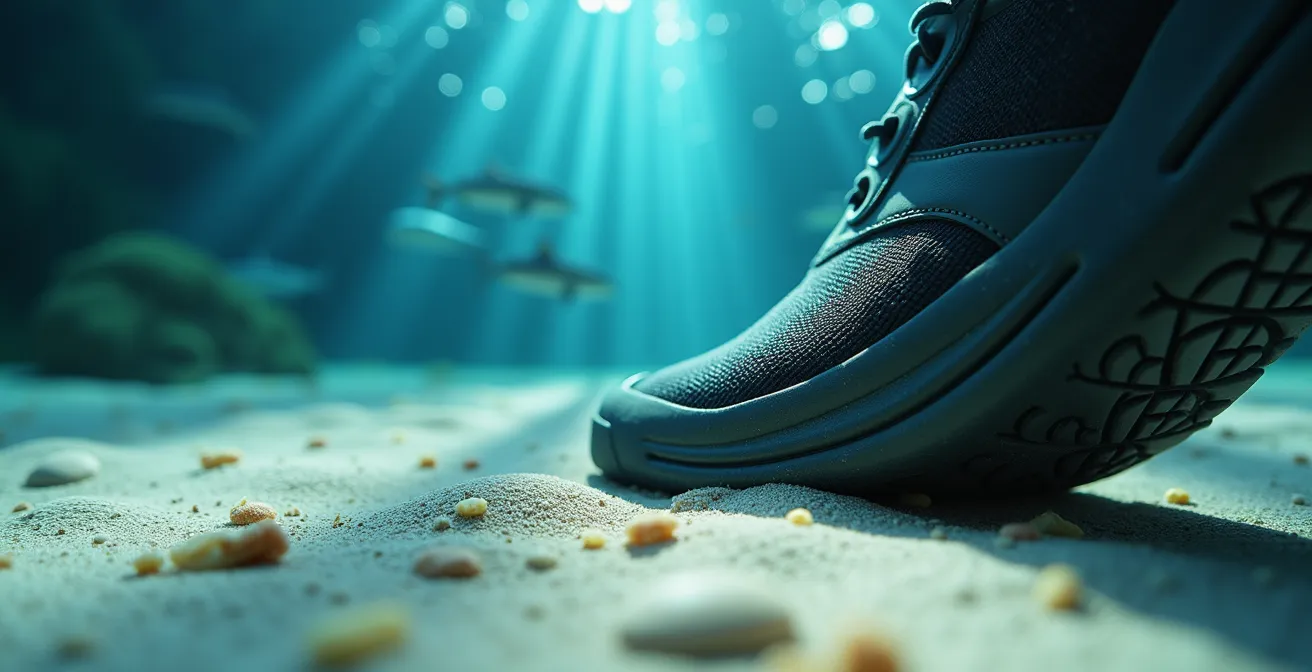
Why Water Shoes Are Mandatory for the Shark Lagoon Walk?
While we focus on swimwear, what’s on your feet is just as crucial, especially when you step off the slides and into interactive experiences like a Shark Lagoon walk. The “mandatory” rule isn’t just about a park’s dress code; it’s a non-negotiable safety protocol rooted in three key factors: grip, protection, and hygiene. The floors of these lagoons are designed to look natural, but they are incredibly slippery. Specialized water shoes provide the necessary grip to prevent a fall in a very inopportune place.
This macro photograph highlights the kind of specialized sole you should be looking for. The deep textures and specific rubber compounds are designed for maximum underwater grip.
Furthermore, these environments, while clean, are still aquatic ecosystems. A proper water shoe with a durable rubber sole acts as a vital barrier, protecting your feet from unseen sharp edges on decorative rocks and potential bacterial exposure. It’s no surprise that a review of safety protocols at major aquariums mandate protective footwear in 100% of their professional immersion programs. They understand that a minor cut on your foot can become a major problem in a water-based environment.
The material of the sole makes all the difference. Not all water shoes are created equal, and choosing the right one is a matter of performance.
| Sole Material | Grip Level | Durability | Protection |
|---|---|---|---|
| Rubber Compound | Excellent (9/10) | High | Maximum bacterial barrier |
| Synthetic EVA | Good (7/10) | Medium | Moderate protection |
| Neoprene Base | Fair (5/10) | Low | Basic coverage only |
So, when a park insists on water shoes, don’t see it as an inconvenience. See it as an essential piece of performance gear that allows you to walk among sharks with the confidence of an expert, focusing on the awe of the moment, not a potential slip-up.
Shark Safari vs Snorkeling: Which One Gets You Closer to the Sharks?
For the ultimate thrill, many parks offer in-water shark encounters. But which option, the helmet-based “Shark Safari” or traditional snorkeling, truly delivers the most intense experience? The answer depends on your definition of “closer.” While snorkeling offers more freedom of movement across the surface, the Shark Safari gets you physically nearer to the animals in a more predictable way. It’s about trading surface freedom for controlled, bottom-dwelling proximity.
With a Shark Safari, you’re walking on the floor of the tank, placing you directly in the sharks’ habitat at a depth of 10-12 feet. This method provides an incredible 180° panoramic view and brings you within a few feet of the sharks, whose paths are often guided by the attending marine biologists. Snorkeling, by contrast, keeps you at the surface, looking down, with the distance to the sharks being far more variable. The predictability of a safari encounter is much higher, often guaranteeing sightings.
This comparison matrix breaks down the key differences to help you choose your thrill.
| Factor | Shark Safari (Helmet) | Snorkeling |
|---|---|---|
| Average Distance to Sharks | 3-5 feet (controlled) | 5-15 feet (variable) |
| Field of View | 180° panoramic | 120° with mask |
| Depth Access | Bottom walking (10-12ft) | Surface only |
| Duration | 20-30 minutes | 45-60 minutes |
| Encounter Predictability | 95% guaranteed sightings | 60-70% variable |
While the thought of being so close is intimidating, remember these are highly controlled environments. A statistical analysis of controlled shark interactions shows that incidents are incredibly rare when safety protocols are followed. The helmet experience is designed to be awe-inspiring, not terrifying, providing a safe window into their world.
Ultimately, if your goal is a guaranteed, up-close, and personal moment with these magnificent creatures, the Shark Safari is the undisputed champion. It’s a controlled dive that delivers an open-water thrill without the open-water variables.
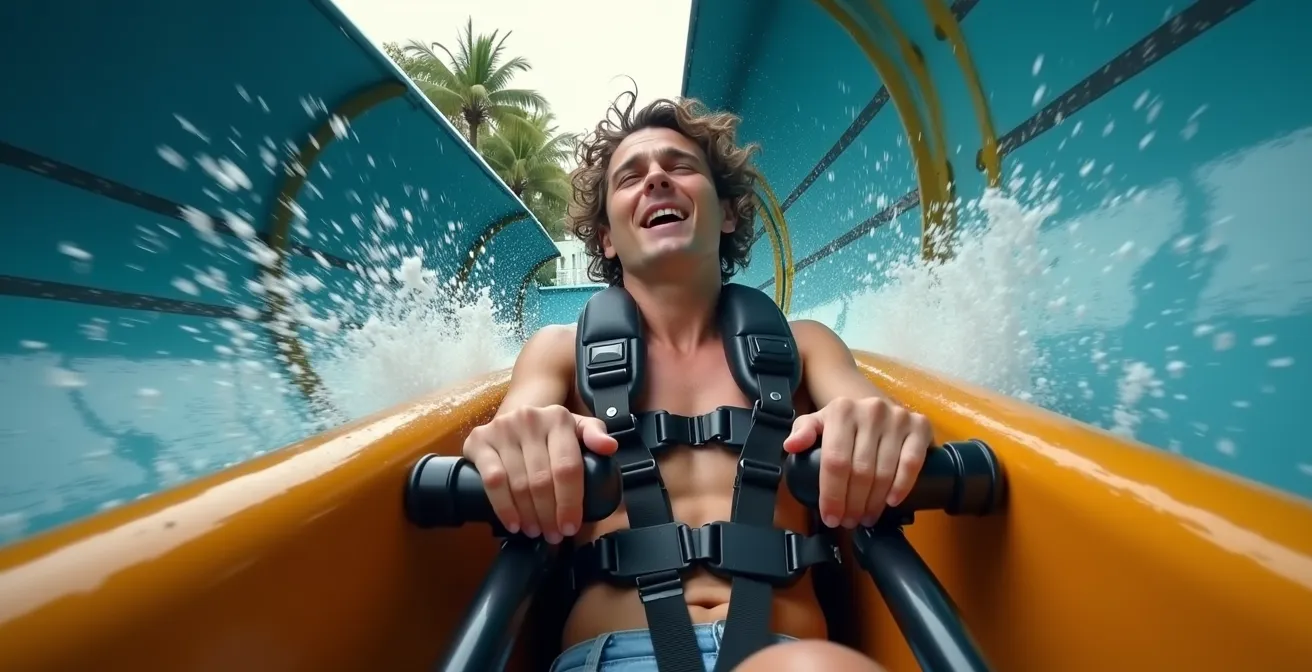
Chest Mount vs Head Strap: What Is Allowed on the Slides?
Capturing your high-speed descent is a modern rite of passage for any thrill-seeker. But strapping on a camera isn’t as simple as hitting “record.” Most water parks have strict rules, and for good reason. When it comes to mounting an action camera, the verdict is almost unanimous: chest mounts are in, head straps are out. The reason is pure physics and safety engineering. A head strap presents a significant snag hazard on the seams of a slide tube or in the event of a raft flipping. The forces involved can be dangerous.
This first-person view, typical of a chest mount, shows the ideal, unobstructed line of sight that is both thrilling to watch and safe to film.
A chest mount, by contrast, keeps the camera secure against the largest, most stable part of your body. It has a lower profile and is far less likely to get caught. As a leading industry voice on safety, WhiteWater West Industries, points out, the danger is real. As their official guidelines state:
Head straps pose a snagging and choking hazard during high-speed turns, while chest mounts’ rigidity is safer but can affect body posture for optimal sliding
– WhiteWater West Industries Safety Guidelines, Water Park Equipment Safety Standards 2024
Just because you’re allowed to use a chest mount doesn’t mean great footage is guaranteed. To get that epic, splash-filled shot without it being a blurry mess, you need to think like a pro. Here are the steps to getting professional-grade footage.
Your Action Plan: Pro-Level Chest Mount Filming
- Angle Setting: Tilt the camera 15-20 degrees upward. This captures both your facial reaction and a clear view of the slide ahead.
- Anti-Fog Protocol: Insert anti-fog strips into the camera housing at least 30 minutes before use and ensure the housing is perfectly sealed.
- Hydrophobic Coating: Apply a water-repellent coating like Rain-X to the lens cover before each session to ensure water beads and rolls off instantly.
- Secure Mounting: Always use a four-point harness system with locking safety buckles to prevent any chance of camera loss during high-G turns.
- Frame Rate: Set your camera to a minimum of 60fps (frames per second) to capture smooth high-speed motion and avoid a blurry, unwatchable video.
By using the right mount and preparing your gear correctly, you can capture every heart-pounding second of the ride safely and effectively, leaving you with an epic souvenir instead of a lost camera or a safety warning.
The Tower of Poseidon Stairs: How Many Steps Before You Drop?
The ride doesn’t begin when you’re pushed off the edge. It begins with the climb. For monster slides like the Tower of Poseidon, the long, winding staircase to the top is a ride in itself—a psychological gauntlet designed to build anticipation and test your nerve. While the exact number of steps is a closely guarded secret of park lore, the real question isn’t “how many?” but “how do you conquer them?” Arriving at the launch platform breathless and with your heart already pounding from adrenaline is a rookie mistake. A true expert arrives calm, focused, and in control.
The key to mastering the climb is managing your physical and mental state. This isn’t a race. Pacing your ascent at about 60-70% of your maximum effort ensures you don’t arrive exhausted. The most powerful tool at your disposal is your breath. Elite military and rescue personnel use specific breathing techniques to manage adrenaline and maintain composure under extreme stress, and the same principles apply here. By regulating your breath, you can actively lower your heart rate and calm your nervous system, so the only adrenaline rush you get is from the drop itself.
Adopting a structured breathing strategy can transform the terrifying climb into a meditative preparation. Different stages of the climb call for different techniques to manage your body’s response.
Instead of letting the endless stairs amplify your anxiety, use them as a tool. By the time you reach the platform, you won’t be a nervous wreck; you’ll be a cool, collected thrill-seeker, fully prepared to take the leap of faith with confidence and control.
Feeding Time vs Dive Time: When Is It Safest to Dive with Sharks?
Timing is everything, especially when you’re voluntarily submerging yourself in a tank full of sharks. The most common question divers ask is whether it’s safer to dive before, during, or after feeding time. The answer, backed by marine biology, is unequivocal: the safest and most rewarding window is in the 30-60 minutes immediately following a feeding. Diving during or just before a feeding is a recipe for anxiety, both for you and the sharks, as their energy is high and their behavior is focused on food.
An analysis of professional diver timing at major aquariums shows that sharks exhibit much calmer behavior patterns post-feeding. They are satiated, less competitive, and tend to move with more relaxed tail movements and wider, more graceful circling patterns. This is the “expert sweet spot” where the animals are still active enough for a spectacular viewing but are not in a frenzied, predatory state. In the wild, many predatory sharks hunt at dusk and dawn, times that experienced divers avoid, especially in murky water where a human could be mistaken for prey.
Despite the intimidating setting, the risk in these controlled environments is exceptionally low. Data from the International Shark Attack File consistently shows that unprovoked incidents are a global rarity, a fact that’s amplified by the safety protocols of a controlled aquarium setting. The sharks used in these encounters are typically non-aggressive species conditioned to the presence of humans, further minimizing risk.
By timing your dive to coincide with this post-feeding lull, you’re not just maximizing your safety; you’re ensuring a better experience. You’ll witness the sharks in a state of calm, allowing you to appreciate their power and grace without the distraction of a feeding frenzy.
Key takeaways
- Swimwear Material Matters: Low-friction materials like polyester and spandex blends reduce hydrodynamic drag, helping your suit stay put.
- Harnesses and Shorts: Longer, smooth-fabric shorts (like board shorts) prevent painful chafing and bunching under slide harnesses. Avoid cotton at all costs.
- The G-Force Factor: The tightest part of your swimwear should be the bands (chest and waist), not the straps. Bands provide structural support against high-G pulls.
Why Short Shorts Are a Bad Idea for Harness Comfort?
Now we get to the heart of the matter: your attire. While we’ve talked about swimwear, an often-overlooked element is the cover-up, especially on rides that use a harness, like zip lines or certain slide launches. Wearing very short shorts or bottoms made of the wrong material is a classic mistake that can lead to significant discomfort. The issue lies in a concept from our physics toolbox: the friction coefficient. This measures how much a material “drags” or “catches” against another surface—in this case, your skin and the harness straps.
Materials like cotton have a high friction coefficient, especially when wet. This means they are more likely to bunch up, chafe, and dig into your skin under the pressure of a harness. This can turn a thrilling ride into a painful ordeal. In contrast, materials designed for athletic wear, such as quick-dry polyester or spandex blends, have a very low friction coefficient. They are smooth and glide easily, minimizing the risk of uncomfortable rubbing or chafing. This is why you see professional athletes in sleek, synthetic fabrics, not cotton t-shirts.
This data clearly shows how material choice directly impacts performance and comfort.
| Material | Friction Coefficient | Drying Time | Flexibility Score |
|---|---|---|---|
| Quick-dry Polyester Board Shorts | Low (0.3) | 20 mins | 8/10 |
| Spandex-blend Athletic Leggings | Very Low (0.2) | 30 mins | 10/10 |
| Cotton Shorts | High (0.6) | 60+ mins | 5/10 |
| Nylon Swim Trunks | Medium (0.4) | 25 mins | 7/10 |
Choosing longer shorts (like board shorts) made of a smooth, quick-dry material is a strategic decision. It provides a protective, low-friction layer between your skin and the harness, allowing you to focus on the experience without wincing in pain. It’s another example of engineering your attire for peak performance.
Deep Water vs Shallow Water Interaction: Which Is Better for Non-Swimmers?
For non-swimmers or those with a fear of water, the idea of an interactive aquatic experience can be daunting. Intuitively, shallow water seems safer. You can touch the bottom, and the exit is always just a few steps away. However, for many, deep water interactions—when done correctly with high-performance personal flotation devices (PFDs)—can be a more comfortable and transformative experience. It’s a counter-intuitive but powerful psychological reality.
A study on non-swimmer confidence in controlled environments found something remarkable. In shallow, crowded areas, aquaphobic participants often felt more anxious due to the chaotic splashing and the fear of being knocked over. In deep water, outfitted with a snug PFD, they reported feeling more secure. The zero-gravity sensation of floating removes the anxiety of foot contact and balance, allowing them to relax. Furthermore, being in a small, guided group in a deep-water setting was perceived as safer than being in a crowded shallow pool.
The key to this confidence is a structured introduction to the water and proper equipment. A high-quality PFD isn’t just a safety device; it’s a tool that enables a feeling of weightlessness and security. Following a few simple steps can help anyone, regardless of swimming ability, feel at home in deep water.
Your Action Plan: Deep Water Confidence Steps
- Start with a Proper PFD Fitting: The vest should be snug but not restrictive. When you lift your arms, it shouldn’t ride up past your chin.
- Practice Controlled Breathing: Before you even enter the water, take several deep, slow breaths to calm your nervous system and prevent an initial panic response.
- Enter Gradually: Use the safety rails or a ladder to enter the water slowly. Don’t jump in. Allow your body to acclimate to the temperature and the sensation of the PFD.
- Focus on the Float: Once in the water, lean back and let the PFD do its job. Focus on the sensation of being held up by the water rather than the depth below you.
- Use the Buddy System: Stay close to your guide or an experienced swimmer in your group. Their calm presence provides immense psychological support.
By embracing the right gear and a controlled approach, non-swimmers can not only participate in these incredible experiences but may also find them to be the highlight of their visit. It proves that with the right engineering—both of equipment and of mindset—even the most intimidating environments can be conquered.
Frequently Asked Questions about Shark Dive Safety
What are the signs that sharks are agitated?
Key indicators of shark agitation include jerky, sudden movements, an arched back, a raised head position, and pectoral (side) fins that are pointed sharply downward. Exaggerated, rapid tail swishing also signals discomfort or stress.
How do controlled environments differ from open water?
Aquarium encounters are fundamentally different and safer. They typically use non-aggressive shark species, rely on conditioned feeding schedules to ensure predictable behavior, and have marine biologists constantly monitoring the animals and divers for any signs of stress.
What’s the safest time relative to feeding?
The unanimous ‘expert sweet spot’ for diving is approximately 30 to 60 minutes after a scheduled feeding. During this window, the sharks are satiated and calm but remain active enough for an engaging and spectacular viewing experience.